Learn how to make chocolate from cacao nibs! Whether you’ve purchased some cacao nibs from the store or cracked your own from cacao beans, chocolatier Simon Knott explains how you can turn those bitter nibs into sweet delicious chocolate.
As a chocolatier, working with chocolate most days, you will quickly learn the ins and outs of chocolate styles, products, and different techniques. As chocolate is the principal ingredient of your working day, it makes sense to experience and understand the distinct steps involved in the production from the pod to the packet. You will gain a much clearer insight into how each step affects the flavour and texture of this complex product.
It’s now possible to buy whole cacao pods and cacao beans online, so the raw ingredients for your experiments are quite accessible. It’s also straightforward to adapt the processing steps for the home kitchen, using equipment you already have to hand. We can also adapt the bean-to-bar steps to making real chocolate from cacao nibs (yes, that bag of bitter cacao nibs you bought from the store can be turned into chocolate).
So, the aim of this article is to provide you with the know-how on how to make chocolate from cacao nibs. We also explain how to make cacao nibs from scratch, using raw cacao pods, if you enjoy eating cacao nibs in their natural non-chocolatey form.
What are Cacao Nibs?
The cacao tree produces a fruit or pod that contains seeds or beans for manufacturing chocolate and cocoa powder. Manufacturers produce cacao nibs after complex processing, which includes fermenting, drying and roasting, all of which help to develop the flavour profile of the final chocolate.
Made of broken-up pieces of the cacao bean, the cacao nibs are similar in texture to a hard nut with a bitter chocolate and fruity flavour. Cacao nibs haven’t undergone the further industrial processing that most chocolate and cocoa powder products do. Consequently, they contain a much higher proportion of cocoa butter and they don’t contain added sugar or flavours, such as vanilla.
Cacao nibs have a naturally slightly bitter flavour, while they contain high levels of natural antioxidants and minerals. As they aren’t naturally sweet, they are an interesting and healthy addition to a variety of sweet and savoury recipes in addition to chocolate recipes, such as salads, smoothies, cookies, cakes and ice cream.
Do Cacao Nibs Melt?
The short answer is, no.
Cacao nibs are hard in texture, a bit like a hard nut. So, exposing them to heat isn’t going to do very much. So, how do cacao nibs melt? The flesh of the nut binds up the cocoa butter contained inside, preventing its release even after heating.
Manufacturers sometimes label cacao nibs as ‘nature’s chocolate chips’ and this leads to confusion when consumers use cacao nibs in baking recipes, expecting them to melt in the same way as a conventional chocolate chip.
As the cocoa butter is bound up with the cocoa solids in the cacao nib, it requires some extra energy to release it. This is usually in the form of grinding the warmed cacao nibs, which, after some effort, will turn into a uniform liquid called cocoa liquor.
How to Make Chocolate from Cacao Nibs
The process for transforming raw cacao nibs into chocolate involves numerous steps, which gradually improve the flavour and texture of the cacao until you reach the recognisable qualities of chocolate. Fortunately, you can easily adapt all the steps of how to make chocolate from cacao nibs for the home kitchen, without the need for any specialist equipment.
An overview of the steps for how to make chocolate from cacao nibs are:
- Start with roasted cacao nibs
- Grind cacao nibs into liquor
- Make chocolate liquor into chocolate
Equipment you will require:
- Spice grinder, coffee grinder, or food processor
- Sieve
- Mortar and pestle, or chocolate conche/melanger/grinder
- Tools for tempering and molding chocolate
For the home kitchen, it’s best to use a large pestle and mortar for the fine grinding or conching step. It is possible to buy a chocolate grinder or chocolate melanger (£350 approx), which has a rotating drum with a heavy stone that continuously grinds the chocolate mixture until superfine.
Step 1: Start with Roasted Cacao Nibs
For these steps, we are going to assume that you are starting with roasted cacao nibs. If you are starting with raw cacao nibs, then try your hand at making raw chocolate if you prefer.
If you want to roast your raw cacao nibs prior to starting, you can scroll down to the instructions on roasting below. However, be mindful that those instructions are written for whole cacao beans (not nibs) so you will have to experiment with times and temperatures, and perhaps err on the side of caution, when roasting your raw cacao nibs.
Step 2: Grind Cacao Nibs into Liquor
It’s easiest in the home kitchen to grind the cacao nibs either in a high-speed blender or spice/coffee grinder. Working in small batches, add the cacao nibs and grind to a powder. Sift the powder through a sieve and return the larger pieces in the sieve back to the grinder for further grinding. Eventually, the powder will become very fine and then turn into a thick paste as the cocoa butter releases. This can take a while, so give your machine a break now and again to cool down and to stop the motor from burning out.
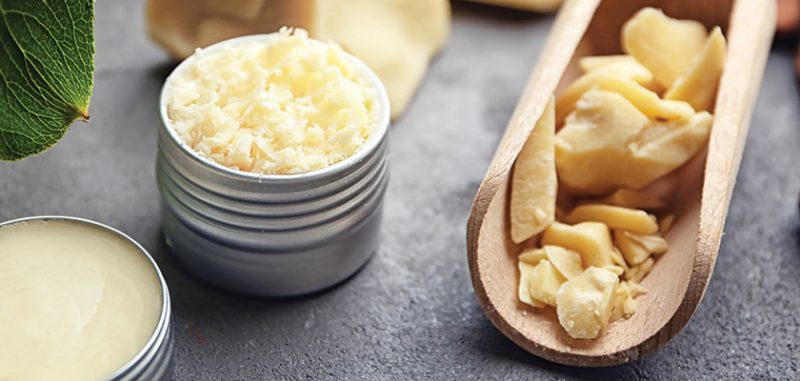
Grind the mixture as fine as you can get it and then add some supplementary cocoa butter for a smoother and creamier finished product. A small amount is adequate, up to 10% of the weight of the cocoa liquor. You should finish with a smooth product, which has a delicious chocolate flavour. The product you have at the end is cacao nib paste or cocoa liquor. It might not be as smooth as a commercial chocolate, because they employ giant, heavy rollers, which have the power to grind the cacao liquor repeatedly.
Step 3: Make Chocolate Liquor into Chocolate
Finally, you get to start making chocolate! Follow the recipe below to turn the cacao nib liquor from Step 2 into finished chocolate. If you are using a mortar and pestle this is going to take some muscle power, so make sure you’re ready for some exercise.
How to Make Chocolate from Cacao Nibs Liquor
Ingredients for milk chocolate
- 165 g cacao liquor
- 85 g cocoa butter
- 165 g powdered sugar
- 85 g milk powder (full fat)
- seeds from one vanilla pod
Ingredients for dark chocolate
- 165 g cacao liquor
- 85 g cocoa butter
- 65 g powdered sugar (or less, to taste)
- seeds from one vanilla pod
Method:
- Melt the cocoa butter in a small bowl over hot water. If using the large pestle and mortar, warm the mortar with hot tap water, dry and add the first three ingredients.
- Grind and pound with the pestle until the mixture becomes uniformly smooth. This is a slow process but ensures the smoothness of the chocolate at the end.
- After about 30 minutes, add the vanilla and pour in the milk powder. Continue grinding until this has become fully incorporated. Keep testing the texture of the chocolate for smoothness. It will take some time, so possibly ask a friend for help at this stage.
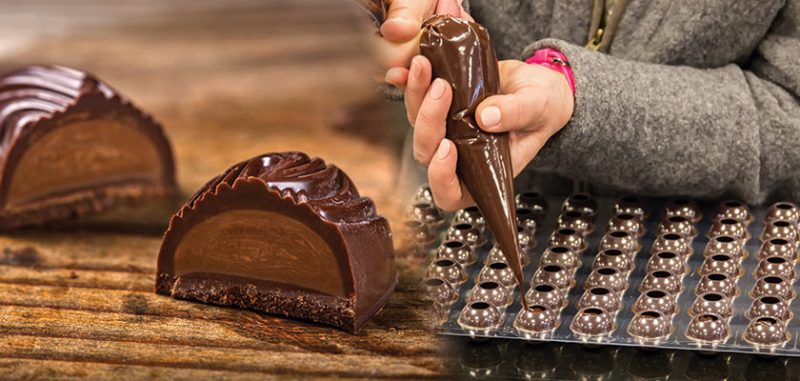
- When the chocolate is sufficiently smooth, transfer it to a tempering machine or place it in a bowl and warm it over hot water for tempering. Add 30 g of milk chocolate buttons to seed the mixture and transfer to a marble work surface. Mix the chocolate on the table until it reaches the correct tempering temperature. Detailed tempering instructions are in this article.
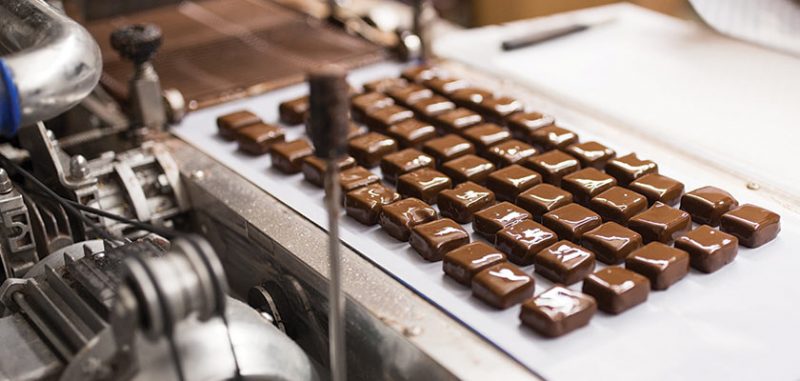
- It is then ready for molding but needs to be used quickly, as it will soon drop below the tempering temperature. Chocolate molding tips are given in this article.
To make dark chocolate, the process is the same as milk chocolate, except omit the milk powder and reduce the powdered sugar to 65 g (or less for a more bitter chocolate).
Making Cacao Nibs at Home
Making your own chocolate from cacao nibs is quite achievable using simple equipment in your home kitchen using dried cacao beans. If you don’t want to start the process from scratch with cacao beans, it’s possible to buy cacao nibs either online or from a health food store, where you can often choose between unroasted and roasted.
The primary processing for cacao hasn’t changed in hundreds of years. Mechanical access to the plantations isn’t easy and so the harvests are still by hand. Although it is likely you will buy your cacao beans already dried, below is a step by step of the entire process, from harvesting cacao pods to the finished cacao nib.
Step 1: Harvesting
Farmers grow the cacao tree (Theobroma cacao) in tropical climates across the globe. These trees produce fruit, the cacao pod that grows on the branches and trunk of the tree. The pods grow in a range of bright colours and in different shapes. When ripe, workers harvest the pods with a machete, taking care not to damage the flowers, and so ensuring further harvests.
Step 2: Extracting the cocoa beans
Use a wooden mallet or a hammer with a piece of cloth to split the cocoa pod carefully. Inside you will see the cacao beans neatly arranged in the centre of the pod.
At this stage, the exterior of the beans is white and covered with a gelatinous polysaccharide, called baba or mucilage. It’s thought this helps to keep the beans hydrated in the tropical temperatures and is possibly also a source of food.
It’s easy to remove the white pulp to reveal the cacao bean inside. For the purpose of making cacao nibs and chocolate, we only need the cacao bean.
The white pulp is edible (monkeys love the pulp over the cacao bean!) with a fruity, tangy, and slightly acidic flavour. Depending on the species of cacao tree which we discuss in this article, the pulp may have exotic fruit hints such as mango, pineapple, passion fruit, or lychee.
Step 3: Fermentation
The aim of fermentation is to enrich the chocolate flavour naturally, so there is more depth and fruitiness. Naturally present microorganisms in the air, such as lactobacillus, convert the alcoholic content to acetic or lactic acid in the pulp. Plantations sometimes keep the beans in wooden boxes with holes in the bottom or pile them onto banana leaves and cover them with further leaves for the fermentation process. Turning the beans regularly ensures even fermentation and enables the acids to drain away.
For home fermentation of cacao beans, you need a small enclosed space, where you can maintain the temperature between 21-28°C (70-85°F), with a high humidity of 80-90%.
A simple alternative for home production is to use a hot water bottle wrapped in a damp cloth. This will mimic the temperature and humidity, but the water needs replacing regularly to maintain the temperature.
- Place the beans in a container, put the hot water bottle to one side and cover the container with a cloth.
- Monitor the humidity and temperature and stir the beans twice a day, pouring off any liquid that accumulates from the pulp. This should ensure they ferment evenly.
- Fermentation should take between 4 and 7 days.
For more tips on fermentation including a different procedure, have a look at Chef Prish’s article on making chocolate from bean-to-bar here.
Step 4: Drying
Workers then transfer the beans to boards for drying. Good air circulation is vital in the drying process. So, the boards are thin and raised 2 inches off the ground to enable good ventilation. Adapting your home kitchen to mimic similar drying conditions is quite straightforward.
Surprisingly, the drying stage is a fundamental part of flavour development and so needs to be completed thoroughly. In particularly humid conditions, drying the beans can be so difficult that plantation workers transfer the beans to a concrete platform under which they light a small fire. They must control the drying process carefully to avoid scorching.
Step 5: Roasting
Roasting the fermented cacao beans achieves several important benefits:
- It helps to develop the full chocolate flavour.
- The heat sterilises any microorganisms.
- The heat helps to loosen the shell from the inner beans.
- It cooks off any of the remaining liquid in the bean.
Remove any mouldy beans left over after fermentation and spread the beans in a single layer over parchment paper in an oven tray. Temperatures and cooking times vary depending on the beans, the oven and whether you want a light or dark roast.
So, roasting can take anywhere from 10 to 35 minutes between 120-160 °C (250-320 °F). Toward the end of roasting, small steam pockets will release from the beans, making a popping sound and you should smell a delicious chocolate flavour like the richness of a brownie.
Step 6: Shelling and Breaking
Once cooled, it’s easy to remove the outer layer of the bean by pressing each one between the fingers. Roasting will have loosened the shell, making this much easier. Keep the beans and the shell apart.
Breaking the beans by hand into small pieces or nibs is then straightforward or place them inside a thicker plastic bag and break them up with a rolling pin. They are edible at this stage with a good chocolate flavour.
Your cacao nibs are now ready to store or use, or make into cocoa powder or chocolate.
Final Thoughts on How to Make Chocolate from Cacao Nibs
By this stage, you should now have a good idea of how to make craft chocolate from cacao nibs. As you can see, it is quite a long process, but we hope one that will give you a taste of what bean-to-bar chocolate making is like. If you have cacao nibs on hand, this is a fun way to experiment with learning the chocolate bean-to-bar making process, while cutting out some of the initial steps.
Before you get started, make sure you read about how to temper chocolate and how to mold chocolate, to ensure you are adequately prepared when it comes to that part of the recipe. Alternatively, if you want to avoid tempering and molding, you could simply make some delicious chocolate sauce or fondue with your cacao nib chocolate instead.
Happy chocolatiering!