Ready to embark on a chocolate-making adventure? Great, but first you need tools! Professional chocolatier Simon Knott explains what chocolate making machines and equipment you need for your new hobby or home enterprise, plus tips for buying the best quality tools for your needs.
Setting up your own home chocolate kitchen doesn’t need to be daunting, but you do need to research and understand the essentials. Before you start to think about buying machines for chocolate making, it’s a good idea to do as much research as possible. This can be free information from the Internet or chocolate-making books or even a chat with existing chocolatiers, who will hopefully share some common-sense tips.
If you haven’t worked in chocolate before, it always makes sense to start small and build on your successes. Things won’t always go according to plan and so if you start small, any errors will also be small and more easily overcome.
When your kitchen is up and running, it’s time to start finding those first customers. You will often find them more welcoming than you imagine. They understand how hard it is to get an enterprise off the ground, so they can empathise with your situation.
One of the biggest advantages of using machines for chocolate making in your own home is the flexibility and the lower overheads, as you won’t be paying rent. It’s a benefit when working from home that there is no commuting, but on the downside, the convenience of working next door can sometimes lead to working all hours.
The popularity of chocolate making machines for home use has grown exponentially over the past two decades. Previously, it was often necessary to buy suitable equipment from dedicated chocolate specialists and their specialist prices. However, now with the advent of Amazon, eBay and other platforms, it is possible to buy directly from manufacturers with just the same level of after-sales service.
Essential Chocolate Making Machines for Home Use
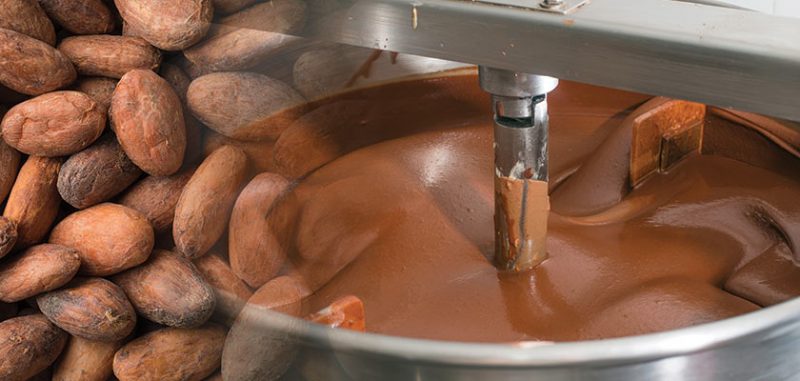
Chocolate Conche or Grinder
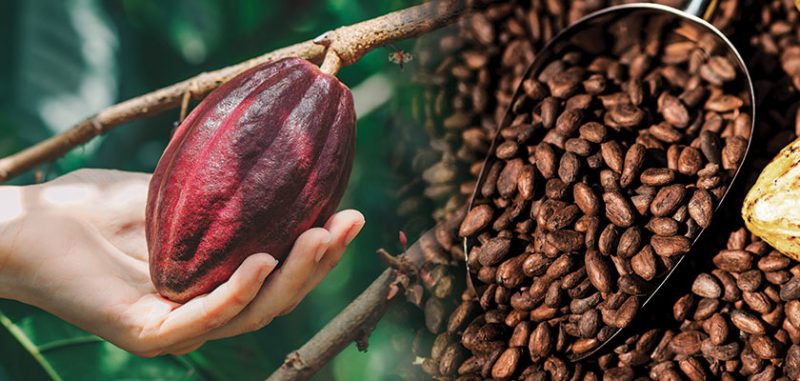
If you are making bean-to-bar chocolate from cacao beans (or even from cacao nibs), then you will need a grinder or conche to refine the chocolate. It is possible to do this with a mortar and pestle, but you will achieve better results with a conche or grinder machine. More information about chocolate conches and grinders is in this article, including buying tips and recommendations.
Chocolate Tempering Machine
If you are setting up your own home chocolate kitchen, you might start with hand-tempering chocolate on a marble slab. This is excellent practice for understanding the process of chocolate tempering and what you are trying to achieve at each of the stages. However, as your sales increase and you need a greater volume of chocolate, it’s time to invest in a chocolate tempering machine, which will save time and offer better consistency.
More information on chocolate tempering machines is in our article here, including choosing, using and maintaining a temperer.
Chocolate Melting Tank
A melting tank is simpler than a chocolate tempering machine, with no mechanism for stirring the chocolate. It has a heating element, which heats the chocolate directly, or via a water bath.
It is possible to temper the melted chocolate in a melting tank by using the seeding method. However, because there is no stirrer, the chocolate needs to be stirred frequently by hand, so the tempering of the chocolate can be haphazard.
A melting tank can be useful if you have a small chocolate tempering machine and growing production requirements, but not the funds to buy a larger tempering machine. By melting chocolate both in the temperer and the melting tank, you will have a ready source of melted chocolate ready to transfer to the temperer as it empties.
Other Chocolate Making Equipment & Tools
Chocolate Moulds
To create attractive shapes for chocolates and 3-D models, you will need the appropriate chocolate moulds. There are two types:
Polycarbonate moulds
Polycarbonate is a tough plastic that is moulded into many types of designs, into which you can pour melted chocolate and fillings. It’s easy to polish the inside of the mould with a cloth to ensure a high gloss finish on the chocolate.
Pros:
- Flawless glossy finish
- The mould contracts less than the chocolate for easier release
- Better heat transmission during cooling
Cons:
- More expensive than silicon
Silicon Moulds
Silicon moulds come in every conceivable shape. They are easy to use with chocolate and are heat stable, so ideal for high-temperature sugar work. It’s possible to create glossy and matte finishes, as well as fine details.
Pros:
- Reasonable price
- Huge selection of styles
- Also used for isomalt, sugar paste and other modelling components
Cons:
- Flimsy construction can cause spills
- Prone to tearing after repeated use
Dipping Forks
Using a dipping fork to hand-dip items in chocolate takes dexterity and patience to get it right. There are several different designs of fork for different applications. For example, there is a spiral circular basket to hold a truffle or larger nut, or a two-pronged fork for individual chocolates or pieces of candied fruit.
Dipping forks shouldn’t be expensive. They may not come with a wooden handle, but it’s often easy to find a whole set of dipping forks for the same price as one fork from a speciality supplier.
Scales
An accurate set of electronic scales is a vital purchase for any home chocolatier. As with baking recipes, you need to measure out chocolate recipes accurately for the best results.
Most chocolatiers sell their products by weight and consequently fall under local government law controlled by Trading Standards (UK) or Federal Trade Commission (US) or The Competition and Consumer Act 2010 (AUS). Laws vary, so you need to clarify your local legislation.
You can buy scales classified as ‘trade approved’, meaning the company manufactured them to legal specifications. Often, you must have the scales calibrated every two years to ensure they are still accurate.
Sometimes there is more leniency in verifying your scale’s accuracy. Sometimes it is acceptable to buy 50 g and 100 g stainless steel weights, test your scales each month and keep a record to verify they are still accurate. You will still have to take the weights to your local government department every two years for them to verify the weights, but this is at a minimal cost.
Again, it’s necessary to do your own research not only on product prices but also on the requirements of the local food production laws where you live.
Thermometer
In any home chocolate production, you will need to take the temperature of ingredients and products at different stages of manufacture. Digital probe thermometers have an excellent track record and are reliable and cheap. Usually, the probe thermometer consists of a thin metal probe attached by wire to the control unit.
Similarly, infrared laser thermometers involve more technology. An infrared laser beam from the control unit strikes the chocolate surface, and the energy emitted gets converted into a temperature reading.
| Digital probe thermometer | Infrared laser thermometer | |
| Pros | Slightly cheaper Little maintenance | No physical contact Fast Measures from a distance |
| Cons | Wired connection makes it easy to drop/get wet | Only takes the surface temperature, so reading may vary |
When buying a thermometer always check that its working temperature range is adequate for your requirements. Nearly all probe and infrared thermometers are battery-powered. Often a specialist online thermometer retailer is a good place to find one or check on Amazon and eBay too.
Flexible Plastic Scraper, Stainless Steel Scraper and a Palette Knife
You won’t ever regret buying several flexible plastic scrapers for your home chocolate kitchen. They are invaluable for taking the hard work out of jobs, such as scooping up melted chocolate, fillings, and ingredients and best of all, they cost next to nothing. Made from a half-moon of flexible plastic, you can use them to scrape the excess chocolate off filled moulds. Or once you’ve scooped out the bulk of the chocolate left in your tempering machine, use a scraper to access all those hard to get to corners. No wasted chocolate and being plastic, the scraper won’t scratch your stainless-steel bowl.
If you decide to temper chocolate by hand, you will need a good stainless-steel scraper with a handle. This needs to be flexible enough so that you can effectively work the melted chocolate on the marble table.
A palette knife is another ‘must-have’ item of chocolate-making equipment. It can come with a wooden or plastic handle. It has a flat rounded blade that enables you to smooth out or work chocolate on a flat surface.
Whisk
If you are going to be making truffles and fillings for chocolates, you will need a hand whisk. Sometimes ganache and fillings can be stiff, so you want a whisk that is sturdy enough for the task. When whisking chocolate products, the aim isn’t to incorporate air but more to ensure the dispersion of the fat molecules and thorough mixing.
It’s likely to be cheaper to buy a whisk and a palette knife from a catering supplier than the same items from a specialist chocolate equipment supplier.
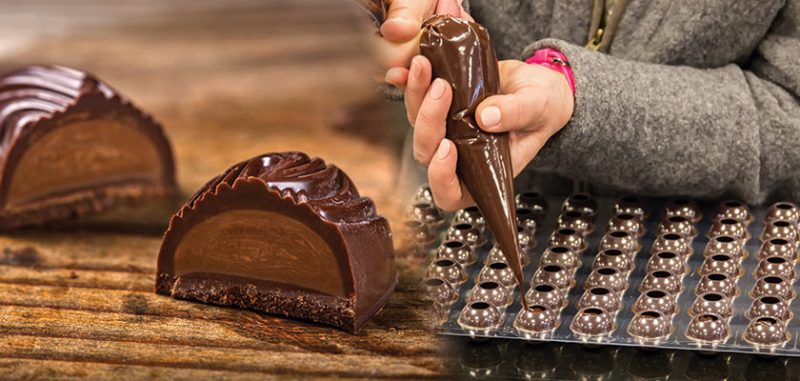
Piping Bags and Nozzles
A piping bag and nozzle is a great tool for many tasks in chocolate production. When you need precision filling, it’s much easier with a piping bag and nozzle to gauge the direction of the filling and see exactly how much is going in. When not using a piping bag, it is easy to spill filling on the rim of the case, which may make it difficult to seal.
There is a good range of piping bag styles and sizes and an even greater selection of nozzles, so it’s always possible to find the right one. It’s important to have a professional finish on your products and using a piping bag and nozzle is an inexpensive method to achieve this.
Factors to Consider when Buying Home Chocolate Making Equipment
Budget
There is such a wide range of choices for home chocolate-making equipment that it is difficult to narrow down the best option. When starting out, it’s best to keep within your budget and only buy the equipment you need. Fully automatic tempering machines are more expensive, so work out if a semiautomatic machine is adequate, so long as you understand the extra techniques to operate it. Forecast your production both in financial terms and how many bars/chocolates you want and can produce a day.
So, if this means starting with a smaller chocolate temperer and graduating to a larger one after a couple of years, that may be the best plan. It depends entirely on your plans for your company; so write a coherent plan about the products you’re going to make and how you see your company growing. When it comes to trading up there is always a strong second-hand market for chocolate-making equipment and prices hold up well too.
Space
With a home chocolate kitchen space is always going to be at a premium. So, when considering any new equipment, check its footprint and how it will fit in with the available space. If you are constantly moving items from one place to another, you will waste a lot of production time.
Country
It’s possible to buy tempering machines and melting tanks from suppliers around the world. Consequently, the power supply required can vary, so always check before buying if it needs adjusting for your requirements. Tempering machines and melting tanks are generally reliable. However, when buying a new machine, enquire about servicing contract costs and the process of servicing.
Working Height
How high is the chocolate machine? You will be standing by it for long periods as you work with the chocolate. Is the bowl of the machine easily accessible by hand for you when the machine is on your tabletop?
Capacity
Do you need a large machine a capable of commercial production, or just enough to share with family and friends? For example, a smaller tempering machine will take 500 g to 1 kg in a single batch, while a larger home machine will often take up to 12 kg. What size best suits your planned production?
Find the Best Machines
Read all you can from reputable sources to get up to speed with the most reliable, effective and cost-effective chocolate machines available. Check out second-hand catering and chocolate equipment suppliers using a search such as: second-hand or used chocolate making equipment.
Research using equipment review sites and chocolate sites to find information from existing owners about the best and worst machines.
Final Thoughts on Home Chocolate Making Machines & Tools
We hope you’ve found this article from Simon informative, and that it has given you a clear picture of the various chocolate making machines and equipment to start crafting your own chocolate at home, for fun or profit.
In addition to this, we recommend you read the articles on how to make chocolate from bean to bar if you are interested in learning to craft chocolate from scratch, as reading through the steps will also act as a prompt for any equipment or tools that weren’t covered in this article. Likewise our article on molding chocolate is also worth a read over for the same reason.
Although gathering a nice collection of tools and machines is nice, the most important thing after you have the basic set of equipment you need is to just dive in and give it a try. It won’t be perfect the first time, and that’s ok. Don’t let the equipment you have in your kitchen hold you back from experimenting and trying. Over a few tries, you’ll work out what equipment you need, and you can keep expanding your toolkit as you go along.
Don’t fall into the trap of thinking you need all this equipment before you can get started, and please don’t use your lack of any of these tools as an excuse to not start doing it. It’s like painting or drawing or music, or any other craft. If you keep using the excuse of not having the best pencils or guitar strings as an excuse for not playing, you’ll never get on with learning and mastering the skill.
If you find yourself falling into equipment-paralysis, then just step back. Challenge yourself to not buy any extra equipment at all, and see what tools you can use out of your kitchen, instead. You’ll quickly learn which extra tools would be useful to have!
The main thing is to give it a try and have fun. When you’re ready to invest in more chocolate making machines and equipment, come back here for tips on which ones to get.
Happy chocolatiering!