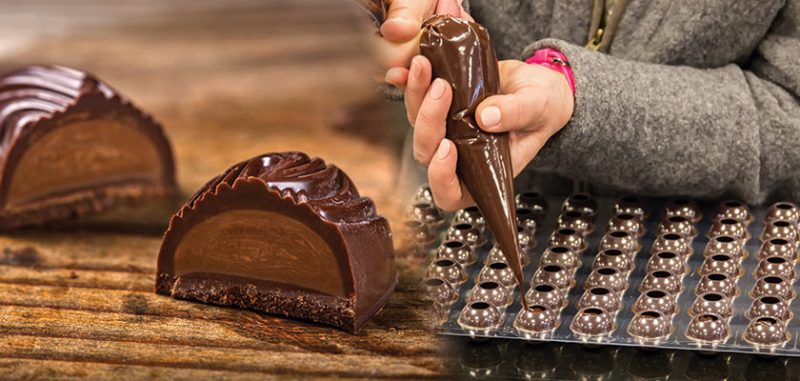
In this quick tutorial, Chef Prish explains how to make chocolate coating for candy, nuts and other solid fillings, using simple tools and dipping techniques.
There are very few of us who can overcome the temptation of a beautiful chocolate-dipped strawberry or marshmallow. Chocolate-dipped anything is an elegant addition to your dinner party, and while the technique may seem simple, there are a few steps to get right for the perfect finish.
To get started with making professional standard coated and enrobed chocolate treats at home, here is Chef Prish’s guide to chocolate coating.
How to Make Chocolate COating for Candy & Nuts
Chocolate coating, also known as enrobing, refers to dipping your caramel, ganache, truffle, cluster, or praline product, etc, in a chocolate bath so that it has a solid chocolate coat. You can buy special enrobing machines, but here we will explain how to make chocolate coating for candy, nuts and other solid fillings using inexpensive tools.
Essential Tools to Make Coated/Enrobed Chocolate
- a tray or plate to set the enrobed pieces of chocolate
- the individual pieces you want to dip – make sure they are at room temperature and solid enough that they won’t melt in the chocolate bath
- a dipping fork*
- clean cloth to wipe up any drops of chocolate
- a heat gun to warm the fork for dipping and to wipe it down (not essential)
*Invest in a dipping fork. Some are two-pronged, some are three, and some loop to cradle the chocolate. It is also important to use a warmer for coating/enrobing. Dipping tweezers or spiral dipping forks can be used to dip items that are too hard, brittle or awkward to handle with regular dipping forks.

How to Make Chocolate Coating for Candy, Nuts & Other Solid Fillings
Preparation:
- Ensure the individual pieces you want to dip are at room temperature.
- Make sure the chocolate is in temper, and you have your tools neatly laid out. See above for a list of tools.
The temperature of the chocolate has to be just right so that its flow property allows excess chocolate to drip off the product but be viscous enough to create a nice crisp coat.
How to Make Chocolate Coating for Candy, Nuts etc.
- Pick an individual piece up with the dipping fork. Dunk it in and out of the chocolate bath a few times, quite vigorously to enrobe, and pull the excess chocolate off. This see-saw motion allows the chocolate to create a thick enough coat while pulling excess chocolate and air bubbles off.
- Suspend it above the bath for a few seconds to let it drip, then drag the bottom of the fork against the lip of the bath to remove any last bits of chocolate. You don’t want that unsightly chocolate apron forming around your piece as it sets.
- Place the coated/enrobed chocolate on the clean plate or tray you prepared by tilting the fork’s prong’s on the diagonal onto the plate so that gravity pulls the chocolate off.
- Once the edge of the chocolate makes contact with the plate, lower the fork parallel to the plate, then gently drag the fork out from under the chocolate. In this process, the chocolate should not move on the plate. Only the fork moves.
- If you are adding any decorations, wait a minute or two before doing so. They set better in slightly more hardened chocolate.
- Keep chocolate coating until all the pieces are complete, then set it as we did for molds and slabs.
- Once set, wrap or package the individual pieces.
For presenting your chocolates, JoyGlobal have a great range of foil wrappers and other decorating tools you can order online, or visit Simon Knott’s article on using foil wrappers for other suppliers and tips for wrapping the chocolates cleanly.

Conclusion
There you have Chef Prish’s quick guide on how to make chocolate coating for candy, nuts and other solid fillings. To ensure the best chocolate finish, it is important to ensure that the chocolate is correctly tempered, which you can learn how to do in Chef Prish’s guide to chocolate tempering.
If you’ve enjoyed this tutorial, be sure to check out her tutorial on how to make chocolate in molds, or discover how to color chocolate with chocolatier Simon Knott where you’ll learn to make red, pink, black and even gold colored chocolate to really bring that wow factor to your creations.
Happy chocolatiering!