
In this pro chocolate-making tutorial, Chef Prish explains the full process for how to make chocolate with cocoa beans at home, from raw bean to bar.
If you’re curious about making chocolate yourself at home, then today you’re in luck, as that is exactly what we are going to be showing you through today. Whether you are interested in seeing an overview of the process, or need a practical action plan to help you navigate through the steps, this article will be your roadmap.
Making chocolate from scratch, from raw cacao bean to the finished chocolate bar, is no beginner journey, but one worth taking if you are serious about making your own chocolate. Get comfortable as Chef Prish walks you through each step for how to make chocolate with cocoa beans, using authentic bean-to-bar techniques, at home.
Equipment & Materials
- Fresh cacao pods (or cacao beans)*
- Ingredients, including sugar, milk powder and cocoa butter
- Grinding machine (more info here)
- Fermentation equipment, if using fresh cacao pods (more info here)
- Coffee grinder, mortar and pestle, or food processor
- Warmer, such as hair dryer, heat gun or oven
- Grindometer (optional)
- Tempering equipment (more info here)
- Molds and related equipment (more info here)
- Various basic kitchen utensils, such as palette knife, paper towel, spoons etc.
*Note: Starting with fresh cacao pods is only necessary if you want to try following the full process for how to make chocolate with cocoa beans (from raw cacao bean to chocolate). You can start with dried, raw or roasted cocoa beans if you like, which may be easier to find than fresh pods, depending on where you live.
TIP: For more instructions, click through to the how-to article for each topic.
How to Make Chocolate from Cocoa Beans | Introduction
Introduction by Ayla Marika
Here is an overview of the steps we will cover in this article:
When learning how to make chocolate with cocoa beans it is important to understand that the entire bean-to-bar chocolate production process involves two very different tasks, usually performed by two different professionals: chocolate-makers and chocolatiers.
- Chocolate-makers perform the hard, laborious work of growing and transforming raw cacao beans into cocoa liquor and basic untempered chocolate.
- Chocolatiers perform the work of crafting chocolate into finished products, using flair and techniques such as tempering, molding, sculpting and enrobing.
The work performed by the chocolate-maker and chocolatier are two different industries and professions, and rarely will one person or business be responsible for the full process of taking the raw cacao bean to finished chocolate ready for sale. Chocolatiers usually buy chocolate to craft into finished creations, and chocolate-makers create the chocolate to then sell onto chocolatiers and related businesses. For more on this, see Ayla Marika’s article and infographic on how chocolate is made in the factory.
An easy way to remember it is: Chocolate makers create chocolate. Chocolatiers create with chocolate.
While this detail won’t matter much when learning how to make chocolate from cocoa beans at home, it is worth mentioning, so you know there is no pressure for you to master it all. If you’re more interested in crafting fancy chocolates, then it’s perfectly fine to start with store-bought chocolate in Part 2.
Now, let’s get onto making…
How to Make Chocolate with Cocoa Beans | Tutorial
Tutorial by Chef Prish
Learning how to make chocolate with cocoa beans at home is an artisanal experience, one that requires curiosity, experimentation, and finesse. This article will guide you through every step of the way so you can create chocolate that is made to your taste and preference. The bean is your oyster.
PART 1: How to Make Chocolate from Cocoa Beans (Chocolate-Making)
Step 1: Growing & Harvesting Cacao Pods
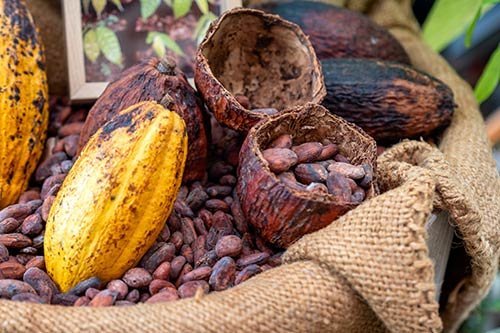
Naturally, before we can learn how to make chocolate from cocoa beans, we need to grow cacao plants that produce the cacao pods. Cacao pods grow on cacao trees (Theobroma cacao), which thrive in tropical regions of the world. In this guide, we don’t really expect you to grow cacao, but for those who are curious you can check out our article on how to grow cacao trees for chocolate.
Step 1: Fermenting Cacao Beans
After harvesting the cacao pods, the fresh pods are cracked open, and the flower cushions removed for the first real step of the process for how to make chocolate from cacao beans: fermentation.
As explained in my article how to make cocoa powder, lacto-fermentation is the the first stage of flavor development of chocolate, triggered by wild bacteria and yeasts floating in the air. These yeasts and bacteria transform the mucilaginous sugars in the cacao, into lactic or acetic acid. Fermentation also breaks proteins down into amino acids, and kills off mold and fungi.
HOW-TO ARTICLE
Step 2: Drying & Roasting Cacao Beans
The next step of the process for how to make chocolate with cocoa beans, is drying and roasting the beans.
Traditionally cacao beans are sun-dried, but at home food dehydrators and convection ovens work perfectly fine. Roasting is then undertaken in an oven or coffee roaster for home cooks, or industrially via drum roasting or air roasting. For detailed instructions on how to dry and roast cacao beans, refer to our how-to article:
HOW-TO ARTICLE
Step 6: Pre-Grinding the Cocoa
The next thing you will do is break the cocoa seeds into smaller pieces. This is called pre-grinding.
It is important to pre-grind the seeds to prevent wear and tear on your grinding machine and to speed up the process of creating cocoa mass/liquor, which refers to cocoa that is broken down into paste or liquid. From solids, we make cocoa powder and from liquids, we make cocoa butter.
You can pre-grind your seeds using a pestle and mortar, a coffee grinder, or a food processor. You want the grounds and machinery to be warm (120°F/ 48°C) so that the longer grinding/ refining process can be even more fluid. If you grind your seeds cold, they take much longer to turn to liquor. You can warm your machinery with a hair dryer, heating gun, or a warmer. Once you pre-grind the seeds, you can move on to grinding.
Step 7: Grinding the Cocoa with Other Ingredients
Grinding and conching are the most important steps in determining the chocolate texture, as we follow the process of how to make chocolate with cocoa beans. Grinding, or refining can take between 24 – 72 hours during which the cocoa grounds will be refined to liquor where it is so smooth and silky, that the grains are undetectable on the tongue.
To grind the cocoa, you will use a special grinding machine. This is an essential piece of equipment for bean-to-bar chocolate making. There are several styles of grinders, including stone melangers, ball mills and more. For more information on each machine, refer to our article on grinding and conching machines.
Regardless of which machine you choose, make sure:
- The grounds are warmed to 120°F/ 48°C
- The machine is warmed up
- Add the grounds a little at a time to prevent the machine from seizing
- Scrape down the sides/ stones every so often
- Let it grind for a minimum of 24 hours before adding sugar (see Step 7b)
- After grinding your liquor, press it through a sieve to catch any unground nibs
Grinding Science
Cocoa seed particles are measured in “microns,” or “micrometers.” One μm equals 1×10⁻⁶ meter/one-millionth of a meter. The human tongue can detect grains up to 35 μm. The ideal micron size in chocolate differs from country to country. American consumers prefer 30 μm in their chocolate; Europeans prefer 12 – 25 μm and the Japanese, 10 μm. Anything under 10 μm will produce a waxy, gummy, overly refined chocolate that leaves the mouth dry.
“The secret is making the size of the particles smaller than the distance between the papillae of the tongue so that when you eat a chocolate you cannot feel the particles on your tongue“
Luc De Vuyst, (food biotechnologist at the Vrije Universiteit Brussel).
Source: AOCS.org
The micron size determines the flavor and texture of chocolate because the finer the micron, the more viscosity (sticky quality) in the chocolate. Higher viscosity requires additional cocoa butter to adhere to non-fat solids (sugar, milk powder, spices, etc) because of the larger surface area between the particles in the chocolate. Think of it as needing to cast a wider net to catch tiny fish in a large body of water.
But remember, too much cocoa butter will also produce that gummy/dry/waxy mouthfeel you don’t want. You can measure microns in your liquor with a grindometer. If this is not feasible for you, simply follow the time/ temperature guidelines.
Adding Ingredients
Partway through grinding, you will add your ingredients, including sugar (see previous step).
Tips for Adding Ingredients to the Cocoa:
- As with the cocoa grounds, add the sugar a little at a time. Give the machine time to slowly break the particles down.
- Some makers prefer adding only the sugar before adding the other ingredients, but others add them all at once. You decide.
- Wait 24 hours before adding sugar. Grinding releases the bean’s acetic acid into the air but if you add sugar too early in the grinding process, acetic acid gets locked in, creating more acidic chocolate. That is why you should wait a minimum of 24 hours before adding sugar.
- If you are aiming for below 20 μm, it will take about 3 – 4 days to refine the sugar, depending on the kind of sugar you use. You could try milling the sugar in a flour mill and pressing it through a sieve before grinding it with cocoa to speed up this process. Some makers get to 20 μm within a day or two.
Ingredients may include:
- Sugar
- Cocoa butter
- Milk powder
- Gums, stabilizers etc.
The ratio of ingredients you add determines the final style of chocolate, as this table shows. From this, you can calculate what quantity of other ingredients you will need.
| Type of Chocolate | Cocoa Mass | Cocoa Butter | Sugar | Milk Powder |
|---|---|---|---|---|
| dark | 65% – 100% | 5% – 10% | 0% – 30% | |
| milk | 35% – 55% | 15% | 20% – 25% | 20% – 25% |
| white | 30% – 45% | 25% – 55% | 25% – 40% |
Here’s an example, if you started with 7oz / 200g of cocoa beans and want to make milk chocolate (this is not a recipe, just an example of how to calculate quantity from percentage):
- Cocoa mass (40%): 7oz / 200g
- Cocoa butter (15%): 2.6oz / 75g
- Sugar (20%): 3.5oz / 100g
- Milk powder (25%): 4.4oz / 125g
Learn more about the different types of chocolate and their ingredient ratios in our article chocolate types compared: white vs dark vs milk chocolate.
Sugar
Sugar can be organic, raw, coconut sugar, which has lovely toffee tones and dark caramel color. It is also low GI and not as sweet as refined sugar. Another option on the more expensive side is monk fruit sugar. Stevia is a zero-calorie sugar derived from the stevia plant. It is advisable to only use stevia if your final chocolate product contains acidic dried fruits like cranberries, pomegranates, or citrus since stevia has an unpleasant metallic end note which acidity absorbs and balances.
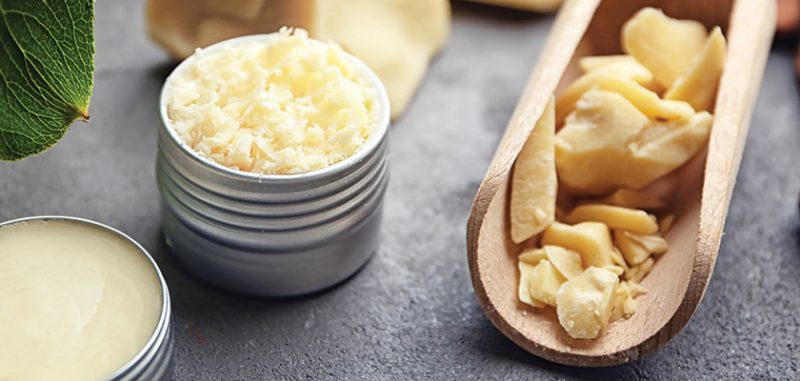
Cocoa Butter
Adding additional cocoa butter in the grinding process makes for even richer chocolate, but most artisanal makers do not add additional butter since it also adulterates the flavor and can verge on becoming an over-refined product.
Milk Powder
Get creative with milk types, as long as they are powdered. Chocolate will not tolerate anything water-based and will seize if coming into contact with it. Try out these powdered milk varieties: oat, coconut milk/cream, cashew, macadamia, walnut, and almond. Famed chocolate maker, Carolina Quijano prefers to toast her milk powder before adding it to the grinding process for a warmer color in milk chocolate and a lovely toasted flavor in both milk and white chocolate.
Gums, Stabilizers etc.
The commercial giants add gums, starches, stabilizers, neutralizers, and gelatin to chocolate that needs a long shelf life. For an overview of the industrial chocolate-making process and ingredients, see our article here. Luckily, as artisanal makers, we do not need to adulterate the purity of our chocolate with those ingredients. Here is a basic guide on ingredient percentages taken from The Code of Federal Regulations. You, of course, do not have to follow these guidelines for your personal use. It is simply here to see what the standard is and to benchmark your measuring process at home.
Step 8: Conching the Cocoa
Next step on your journey of how to make chocolate with cocoa beans, is to leave your liquor to conch for 4 days at a minimum, in a chocolate grinder or conche machine.
Conching is a method developed by Rodolphe Lindt in 1879. This method put Swiss chocolate on the map and was adopted by chocolate makers around the world. During the conching phase, the chocolate is agitated for four days during which volatiles and tannins in the liquor evaporate as air circulates through it. Also, non-fat solids adhere to the cocoa butter, creating an even distribution of flavor and texture.
Some makers continue the conching process in stone melangers directly after grinding, as a continuous process. If you used a ball or roller mill, you will need to export the cocoa liquor into a dedicated conching machine, which can be expensive. Unfortunately, a blender or processor does not conch chocolate, so you will need a specialist machine for this. The lowest micron reported is 90 μm, there is no oxygen flow so the heat builds up too rapidly and acids/ tannins can’t evaporate.
Fortunately, there are affordable chocolate conches/grinders designed for home-chocolate makers. For as little as $500 you can start conching your own chocolate like a pro. If you’re curious about getting your own conche, you are well advised to purchase one that is capable of both grinding and conching. Read more about how to choose a home chocolate grinding and conching machine at the link below.
Alternatively, some makers use a pestle and mortar to hand grind and conch their chocolate to the best of their ability, understanding that they will not be able to create fine, smooth chocolate.
HOW-TO ARTICLE
Step 9: Aging/Maturing the Chocolate (Optional)
After the 4-day conching process, you can age your chocolate for one month and up to several years, much like wine or whiskey. The aromas of wood casks are absorbed by the stable cocoa fat in the chocolate and lend a subtlety that adds depth and mystique beyond simply adding flavors during grinding.
Cocoa beans, dark chocolate (no milk), and pure cocoa powder maintain their antioxidant levels over hundreds of years, whereas olive oil and tea leaves do not. You could try oak, red bush, cedar, pine, and many other choices. Not all chocolate makers see aging as valuable. Read more about those opinions here.
That’s it for how to make chocolate with cocoa beans (Part 1). Now, we move onto the Chocolatier tasks – crafting that chocolate into delicious masterpieces.

PART 2: How to Craft Chocolate into Finished Pieces (Chocolatier Tasks)
Step 1: Tempering the Chocolate
After grinding and refining comes tempering, which is the first step in crafting chocolate after we have worked out how to make chocolate from cocoa beans.
Tempering is the process of warming, cooling, and agitating chocolate to stabilize it.
Tempering is an essential step to creating chocolate with beautiful gloss, flavor and texture. Untempered chocolate is more susceptible to white blooming on the chocolate surface, is dull, has an unpleasant texture (for example, greasy or crumbly), and cannot be molded properly.
Tempering is an art unto itself, so we’ve dedicated an entire article to it. The steps for tempering are covered in the article at the link below, so jump over there for a full explanation of the tempering process.
HOW-TO ARTICLE
Step 2: Molding & Enrobing
Once tempering is done, you are ready to mold or enrobe chocolate. Like with tempering, molding chocolate is a craft unto itself. We discuss chocolate molding and enrobing in a separate at the link below. Here is a quick overview, but please read the dedicated how-to article before you attempt it.
- Prepare your molds. You can find a wide variety of silicone or polycarbonate chocolate molds on Amazon. Polycarbonate is known to distribute the heat of tempered chocolate more evenly, is more durable, and turns out higher-gloss chocolate.
- Add nuts, fruits and colors. Combine your chocolate with chopped nuts, seeds, dried or freeze-dried fruit, and food-grade paints to create a beautiful product.
- Fill the molds and set. Pour or spoon your chocolate into the mold and gently tap it a few times on a hard surface to settle it fully into the mold. Scrape the surface of the mold to ensure the chocolate is sleek and flat with polished corners. Leave it to set at room temperature, if your ambient temperature is 70°F /21°C – 80°F/ 26°C. If not, set it in the fridge.
- Unmold your chocolate. To unmold, turn the mold upside down and gently tap the edge on the counter. The chocolate, if well-tempered, should gently and cleanly release. Snap a piece between your fingers and relish the sound of a clean, crisp snap of your beautifully-tempered chocolate!
HOW-TO ARTICLE
Step 3: Wrapping Your Chocolates
That’s it for how to make chocolate from cocoa beans! Now you’re ready to package and share your beautiful homemade bean-to-bar chocolate.
One of the most common and attractive ways is to wrap your chocolate masterpieces in special chocolate-wrapping foil – discover how at the article below:
HOW-TO ARTICLE
Finals Thoughts on How to Make Chocolate with Cocoa Beans
We hope you’ve enjoyed this tutorial on how to make chocolate with cocoa beans (bean to bar) from confectionery expert from Chef Prish.
If this is your first time making chocolate, we understand these steps may seem daunting. If this is you, please don’t be disheartened. Keep in mind, these are advanced techniques, something to work up to. If you’re a beginner, we recommend you start off slow and don’t attempt to learn how to make chocolate with cocoa beans entirely from scratch just yet.
Other easy ways to start could include:
- Try making simple chocolate from cacao nibs.
- Try making super easy chocolate bars from cocoa powder.
- Make your own cacao powder from fresh cacao pods to practice fermenting, drying and roasting.
- Purchase couverture chocolate to practice tempering and molding.
Once you’ve tried those techniques and feel ready to tackle the full process of how to make chocolate with cocoa beans, be sure to jump back to this article. For more advanced cooks who are ready to take on the task of making bean-to-bar chocolate from scratch, we hope you have a lot of fun and enjoy the process.
Happy Chocolatiering!
This article was original published on 22 October 2022, and updated on 6 March 2025 to improve reader usefulness and helpfulness.